
Kick Drum Muffling & Fine-Tuning
You've tuned your kick to the lowest possible pitch – that's your foundation. Now comes the fun part: shaping that sound to fit exactly what your music needs. This is where you can take a good kick sound and make it great.
Once your drum is back in playing position, test it with your actual pedal beater, not just your hands. This is the sound you'll actually be using, so it's important to hear how everything works together.
The Muffling Decision: Think Before You Stuff
Here's where a lot of drummers go wrong – they immediately throw a pillow or blanket inside their kick without considering what they actually want it to sound like. Muffling can be the best thing you do for your kick drum, or it can completely ruin a great natural sound.
Before you add anything, ask yourself: what does the music need? A big band jazz gig might call for a completely open, resonant kick with zero muffling. A rock session might need focused attack with controlled sustain. Hip-hop could demand maximum punch with minimal ring.
The key is intentional muffling, not random stuffing.
Three Strategic Approaches
Batter Side Only: This gives you more attack from the beater while maintaining the drum's natural tone and sustain. You get punch without losing the body of the sound.
Resonant Side Only: Less beater attack but the sustain is controlled while keeping brighter overtones. This approach maintains the natural drum sound while taming excessive boom.
Both Sides: Attack and sustain become more focused and controlled. Less "boomy" overall, but you sacrifice some of the drum's natural character for precision.
Keep Your Muffling Simple
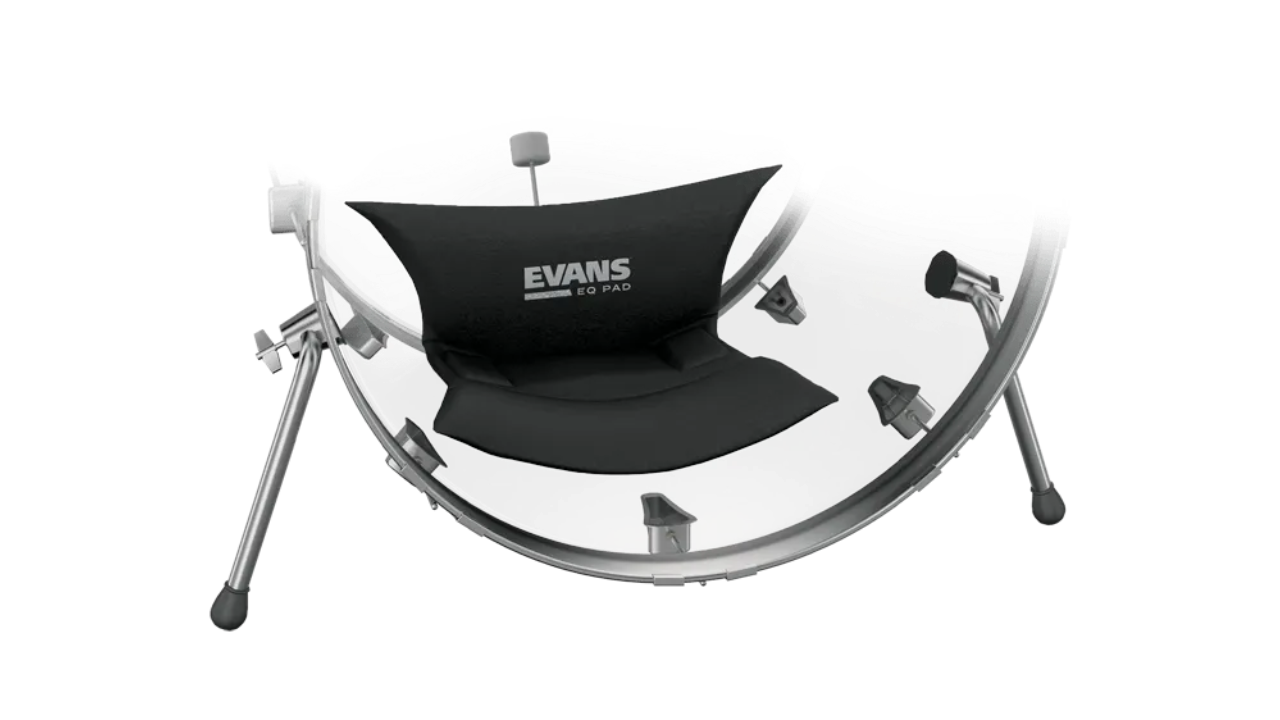
When you do muffle, use something small and manageable. An Evans EQ Pad (pictured above), small pillow, or rolled-up towel usually does the job. The goal is control, not suffocation.
Here's a few other suggestions that I personally use as well: (Amazon Links)
Remo Bass Drum Muffling System
Remo Bass Drum External Dampener
Start with minimal muffling and add more if needed. You can always add more dampening, but you can't un-choke a over-muffled drum without starting over.
Two Quick Setup Adjustments That Make a Big Difference
Kick Drum Angle: Keep your kick fairly flat on the floor. Angling it too much toward you puts tension on the hoop and raises the pitch – essentially undoing your careful tuning work. The drum should be slightly off the ground but not tilted at a steep angle.
Beater Choice: Your beater dramatically affects your attack character. Felt beaters give you warmth and thud. Plastic or wood beaters deliver sharper attack and more definition. Many pedals from companies like DW and Pearl offer dual-sided beaters for quick adjustments mid-session.
The Experimentation Mindset
Here's the truth about kick drum setup: there's no universal "perfect" sound. What works for one musical situation might be completely wrong for another.
Try different combinations. Maybe batter-side muffling with a plastic beater for rock tracks, or completely open with a felt beater for jazz. The goal is building a toolkit of sounds you can access depending on what the music calls for.
Your Next Steps
Start with your well-tuned foundation, then make one adjustment at a time. Test each change in the context of actual playing, not just isolated hits.
Remember, the best kick drum sound is the one that serves the music. Sometimes that means maximum natural resonance, sometimes it means heavily controlled and focused. Your job is knowing the difference and having the tools to achieve either one.
Connect

Free eBooks
Free resources including the home studio guide, snare drum tuning, gear lists and 10 essential ways to get better sounding drums.